Gun Bluing 101 – How to Blue a Gun
If you’re into a gun’s thing, you might have heard the term bluing before. Different forms of bluing have been used by gunsmiths and gun enthusiasts for centuries now to protect guns from wear and damage, but you might still be wondering what gun bluing is.
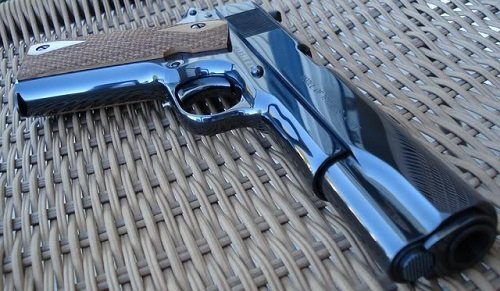
Bluing or black oxidizing is a process of treating steel to create a thin protective shell around it. It works by turning rust, into black iron oxide. The blue-black image of black iron oxide is what gives the name to this process. It can be performed on gun barrels and other firearm components. There are several methods to blue gun barrels, such as hot bluing, cold bluing, rust bluing, niter bluing, charcoal bluing, and heat bluing.
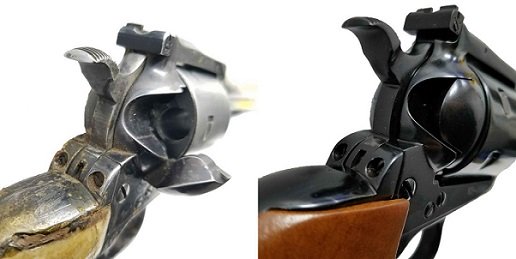
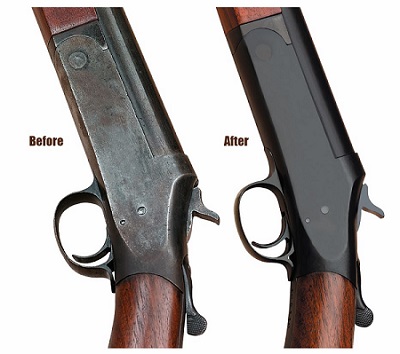
Gun refinishing is one of the most gratifying phases of the gunsmithing work. Few gunsmithing operations are as rewarding as seeing a rusted and badly abused gun transformed into a beautiful, ornate, blue-black finished arm. It turns a worn weapon into one that looks brand new.
Before, the arrival of the modern solutions for bluing guns, giving a gun that unique, blue-black look was a long process that demands many hours of intensive, hands-on work.
Hot Bluing
Hot gun bluing is the most common bluing technique offered by most firearm manufacturers. It’s a very durable finish applied on a variety of steels. The main benefit of the hot bluing method is gun protection from corrosion. This method extends the life of a gun and restores it.
Follow the next 6 steps in order to perform hot gunmetal blue process like true gunsmith.
Step #1 Disassembling and Polishing
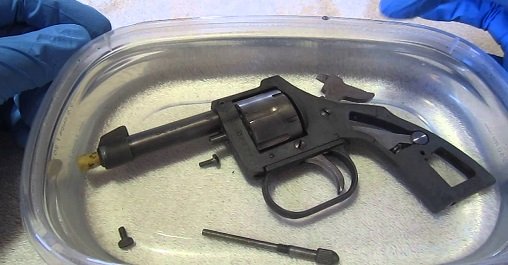
Use steel wool to remove any scarring, loose rust, or pitting from the arm metal. Take the gun all the way apart. Anything you don’t apart will get salt molten in it, and it may be substantially more challenging to disassemble after bluing steel. You also need to remove all the springs you don’t want to blue. Swab the parts, they don’t have to be spotless but get the big stuff off.
The adequate chemicals for the bluing method are caustic chemicals. Always wear rubber gloves while working with these chemicals.
Step #2 Soaking and Rinsing

Step #4 Cold Water Rinsing
Rotate the parts through the cold water to wash off the bluing salts. Leave to air dry for 3 minutes.
Step #5 Boiling
After cold water rinsing, put the gun parts in boiling water. It’ll boil any remaining bluing solution leftover. Simple parts need to be soaked for 15 to 20 minutes, while complex or decorated parts should be soaked for about 45 minutes.
Step #6 Final Process
Soak the treated gun parts in a bath. It’ll protect the finish from sweat, body oil, and of course rust. Let the parts in the oil bath for an hour, until they have cooled, and you finished gun bluing task successfully.
Cold Bluing

Cold bluing is a method that doesn’t require heat. Cold bluing isn’t especially resistant to holster wear, neither it provides a high degree of rust resistance. Generally, it gives an adequate cosmetic retouch of a gun’s finish when applied and additionally oiled on a regular basis. However, rust bluing of small areas will often “hit better the bluing target” than any other cold bluing process. Read the following steps and learn how to cold blue a gun.
Step #1 Cleaning and Polishing
Polish the metal with the sandpaper as you would with either of the other bluing processes, but how you want to clean the arm depends on whether you need to blue the entire gun or touch up existing bluing.
Step #2 Use the Bluing Solution
Gently spread the solution to the part to be blued as evenly as possible, applying a clean applicator. Use the solution in a single pass to cover small surfaces, or in parts no larger than 4 to 5 inches when covering large areas, then smooth it out using sandpaper. It’ll prevent the bluing from looking “messy.”
Repeat the application of the solution several more times until you got the wanted bluing result.
Step #3 Fine Adjustment
“Spice up” the finish with gun oil once you achieve the desired bluing level. Spread a layer of gun oil a few more time, applying a cotton ball to remove the previous layer before spreading a new layer.
Don’t apply the cleaning oil in this stage, as it’ll take off the bluing.
Rust Bluing

Rust bluing is a great blue-black finish that was used by firearms companies before 1940 when hot bluing was invented. Hot bluing isn’t much better, but it’s much less labor intensive.
Rust bluing is very popular nowadays for custom hobbyists and gunsmiths on account of the quality and durability of finish that can be achieved without too much equipment. Rust bluing is a method of making steel rust in a controlled environment.
Niter Bluing
The niter bluing has also known as a fire bluing process that creates vibrant colors, but they’re not always durable. It works best on pins and screws because they’re subject to wear and movement. Niter bluing can produce all shades between straw and dark blue.
The process involves soaking of the gun part into a hot liquid potassium nitrate, which produces a uniformly colored finish. Like all other bluing methods, the most crucial step is metal preparation.
The metal surfaces are block sanded to remove all imperfections and then polished to a mirror shine just before the bluing process, which avoids oxidation of the steel. Even though fire bluing makes a shiny finish, it’s not as durable as hot bluing, since it creates a patina color with wear.
Charcoal Bluing
It is one of the traditional bluing methods used on many fine firearms. The process involves packing the steel in charcoal and “baking” it at approximately 800° for few hours.
This process is established by S&W sometime after WWI. Smith Wesson hired the American Gas Furnace Company to develop a bluing oil that included special whale oil. The guns were put in a rotating drum loaded with wheal oil and charcoal, and the drums were warmed in the oven while the oil/charcoal mix rotated around the parts inside the drum.
“Catching” the right texture and shade of original charcoal bluing finish depends mostly on the underlying metal polish. The final result is a shiny blue-black finish that is very durable. A charcoal blued high polished part will produce a mirror-like finish that is second to none.
Heat Bluing
The bluing process is often accelerated and intensified with the utility of heat. All items become more elastic and smooth to change when they are heated.
Heat bluing or flame bluing method is practically the heat treating that imparts color based on the temperature, and the ingredients present during the heating. By heating gun parts, you can achieve colors from straw to black and deep blue. If you “remove the heat from the gun parts at the right time,” you can get a subtle blue color, just like niter bluing.
How to re-blue a Gun?
In the next 5 steps, you’ll figure out how to re-blue a gun.
Step #1 Polishing
Use steel wool to remove any pitting, loose rust, or scarring from the gun.
Step #2 Cleaning
Step #3 Coating
Coat the gun parts with a mixture of nitric and hydrochloric acid in the metal container. The acid solution forces the metal to rust, but to do so evenly.

Step #4 Boiling
Soak the gun parts in boiling water. It stops the rusting by removing the acid solution.
Step #5 Scrubbing
Scrub off the red oxide rust that has formed, leaving the black oxide finish underneath. Remove the rusted section with a ball of steel wool.
Rerun the acid procedure, boiling, and scrubbing until you get the desired level of bluing.
Step #6 Apply Oil
Apply the oil to gun parts. The oil prevents the formation of rust and protects the metal finish from sweat, body oil, wear, and dirt. Once you’ve spread the oil, leave the parts to stand overnight before assembling.
