How to Solder Copper Pipe as Strong as Welding
If you have to fix a leaky joint in your plumbing, it might be practical to do it yourself with the proper stuff. You can join copper tubing using components commonly available in plumbing, heating, and refrigeration supply houses, as well as hardware stores.
There’s a good way for soldering copper pipe – and the bad way. Learn the difference so that your next kitchen or bathroom plumbing project is smooth and efficient.
How to Solder Copper Pipe Together
The following instructions will demonstrate how to solder a copper pipe and to be sure there’re no leaks.
Step #1 Preparation
Ream the inside of each fitting using a wire brush.
Step #2 Clean outside of the pipe
Use steel wool or emery cloth to clean the outside of the tube;
Step #3 Apply flux
Apply a thin layer of lead-free flux (soldering paste) to the end of the tube with a flux brush. It should cover about one inch of a tube. Insert the pipe into the fitting, ensuring it’s tight against the bottom of the joint. Twist the fitting slightly to spread the paste.
Step #4 Unwind solder pipe
You’ll need 8” to 10” of the wire extended from the spool. Bend the first 2” to a 90-degree angle.
Step #5 Heat the fitting to sweat the pipe
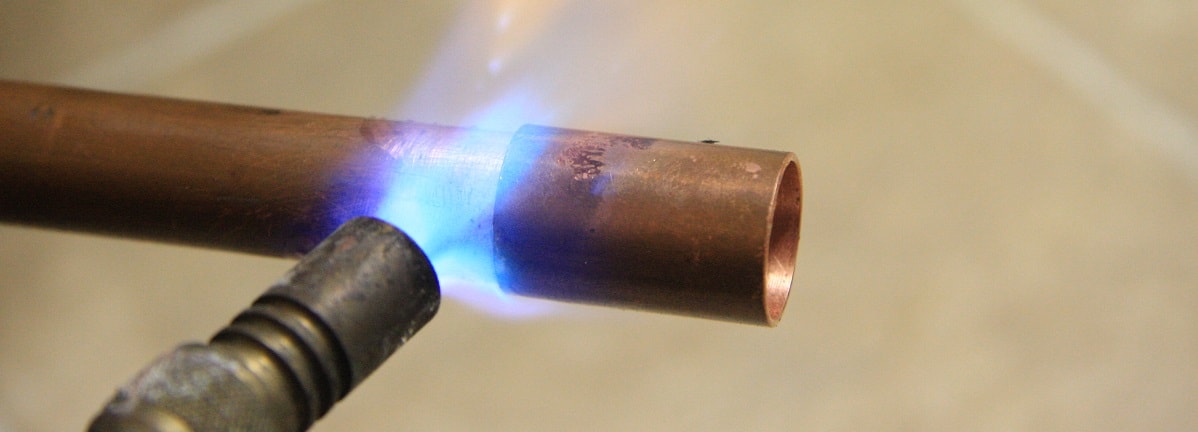
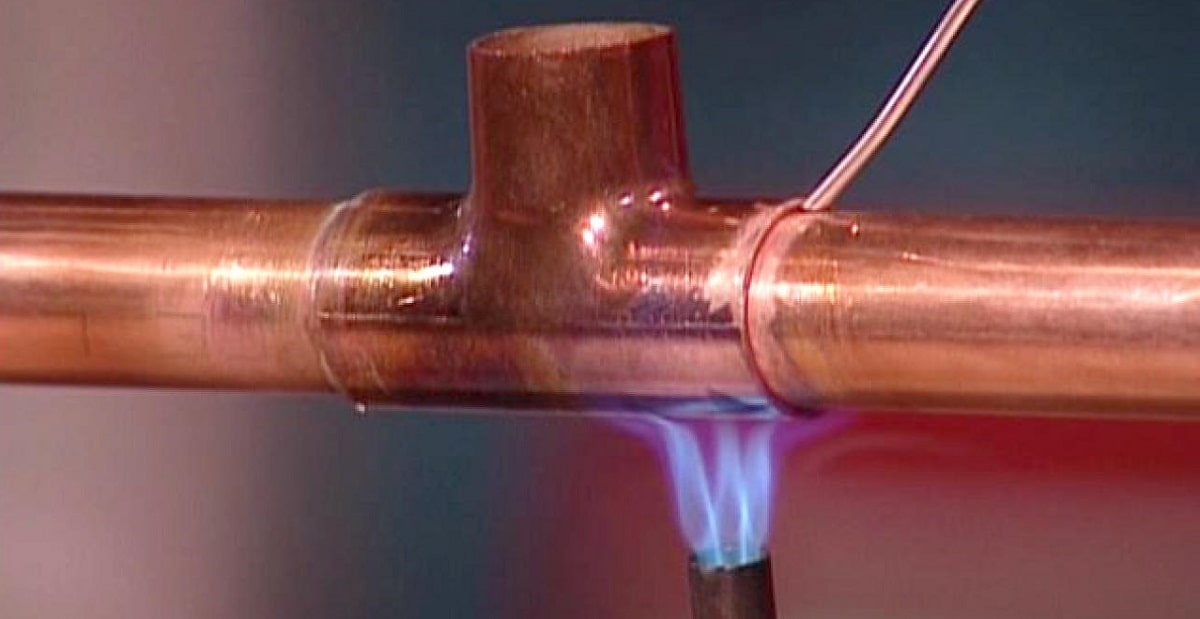
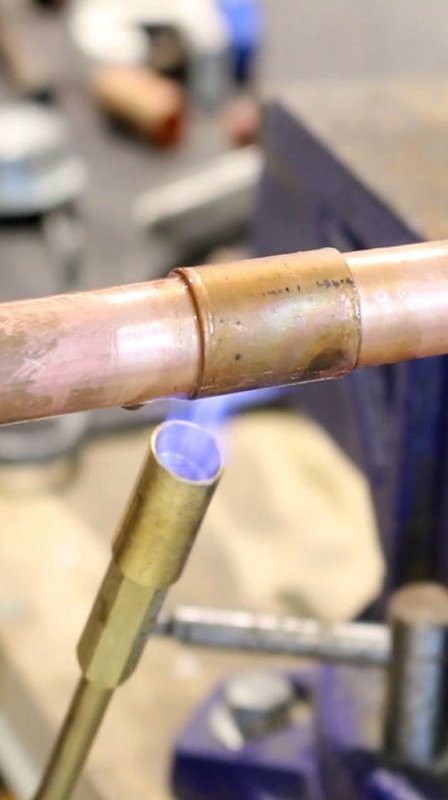
Use the propane torch. Hold the tip of the flame versus the middle of the fitting for 5 seconds or until the flux starts to sizzle. Heat the opposite side of the joint to make sure the heat is evenly spread.
Step #6 Touch the solder wire to the pipe
When soldering copper pipe, first touch the solder wire to the tube. If the solder melts, the tube is ready for soldering.
Step #7 Remove the flame
Insert ½- to ¾-in. of solder into the joint.
Step #8 Clean the fitting
Wipe away the excess solder using a rag. After the fitting and tube have cooled, install the pipe, turn on the water and inspect for leaks. If it leaks, take the joint apart and re-solder it.

How to Solder Copper Pipe with Water in It?
Here’s a practical answer to this question. We’re betting you’re dealing with a copper pipe near the floor where the water can’t drain out.
There’re 2 different methods on how to solder copper water pipe depending on practicality:
- Drain the water out by going to the meter outside by opening the bleeder valve;
- Loosen the connection at the private side of the meter.
It’ll break the vacuum and enable the water to drain out op pipe you’re soldering as long as the meter is as low as or lower than your workpiece. Another way is to employ 3/8″ tubing about 2″ long and either suck the water or blow the water out and spit it into a container.
How to Solder Copper Pipe without Flame
You can do cold soldering or bonding copper pipes efficiently and trouble-free without the need to use flame and solder, which is otherwise known as solderless copper bonding. This method requires pipe and fittings to have very close tolerances, and it can only be guaranteed with rigid pipe and Super Power solderless copper bonding solution.
You’ll need to:
- Clean pipe and fitting with an abrasive P60 grit cloth to make grooves;
- Shake bottle and apply a liquid to the inside of the fitting and outside of the tube;
- Insert the copper pipe into the fitting and rotate 360 degrees to achieve adhesive distribution;
- Flush any remaining adhesive from the fitting and tube;
- It’ll dry for 60 seconds, and cure in 5 minutes for a structural bond;
The drawback of this method is that it can’t be done while the fitting and the pipe are in place, unlike soldered pieces where the total “circuit” can be assembled before soldering.

How to Re-Solder Copper Pipe Joint without Removing It
Since all of the copper pipe joints are really close together, you’ll probably have to revamp them all. At a minimum, you have to heat up the leaking joints and pull them apart and then re-solder them.
Follow the instructions:
- Clean the pipe and fitting;
- Apply the flux;
- Use a MAPP (methylacetylene-propadiene propane) torch and heat up the fitting; when the flame turns green, it’s hot enough;
- Put the solder around the joint. It should melt instantly and get sucked into the fitting, and that’s it.
In case you aren’t so great at soldering, you may need some extra help. For example, one person can use the torch, and the other can apply the solder. That way, you can begin soldering right when the torch is off of the pipe.
How to Fix Copper Pipe without Solder
Water leaks are a homeowner’s nightmare, but there’s a high chance you can fix it yourself without calling a plumber.
We’ll show this process in detail:
- Begin by turning off the main water line in your home and bleeding the system of water, so you don’t get drenched when opening up the tube;
- Take a pipe cutter to remove the leaking section. The round cutters work great since they can be utilized in tight spaces and cut the metal as you turn it clockwise;
- After removing the old pipe, you’ll have to attach a fitting to each remaining waterline end;
- Measure and mark how deep your fitting should be on the pipe;
- You’ll have to deburr the ends of the new and existing pipe and employ an emery cloth to smooth it out;
- Once it’s ready and you’ve measured/cut the new tube, insert it tightly into the fitting, and you’re finished.
How to Sweat Copper Pipe
Sweating copper pipe is another term for soldering or joint for the purpose of sealing a new joint or fixing a fault. This’s a basic plumbing process usually used in improvement projects.
Stick with the steps below:
- Cut the solder pipes using a copper tube cutter or a hacksaw;
- Remove the burs using a file or a wire brush;
- Clean the end of the tube with a special cleaning brush. Work until the surface is bright all around;
- Clean the inside of all fittings;
- Spread the paste on the cleaned tube ends and the insides of the fittings;
- Attach the fitting to the sweat copper pipe end and apply a propane flame in the middle of the heated parts at the same time. Don’t distribute heat directly to the fluxed area;
- Still applying the joint flame, solder the joints together. You only need a little bit around the whole circumference of the tube;
- Wipe excess solder away with a rag, and you’ve finished the job successfully.
RELATED ARTICLES
- Soldering 101
- 7 Superb Methods to Cut Metal
- The Ultimate Welding Guide
- Brazing – All You Need to Know
- 3 Nifty Ways on How to Braze Metal Like a Pro
- 14 Most Efficient Welding Tools in the Industry
- What’s the Chief Difference Between Welding and Brazing?
- Best Gunsmith Schools & Program Comparison
- How to Get Welding Certificate – Welding School, Training, And Certification
- 22 Ideal Blacksmithing Tools for Newbies
Types of Solder
Solder is available in 3 types – 50% lead/50% tin; 95% tin-antimony/5% lead; and lead-free solder. Any water supply tube should be soldered with a solder that contains no more than 5% lead. If possible, employ the lead-free solder.
The 50% lead solder is utilized for copper drain lines. It melts at a lower temp and is capable of bridging larger gaps as it cools. This’s useful when working with large diameter (up to 4”) copper pipe and fittings.
You must pay attention when you purchase solder. The one-pound rolls look very much alike. Check the label carefully as you might buy the wrong one.
Best Soldering DIY Tips
Soldering is surprisingly easy once you learn all the basics. These supplies and tools make soldering so much smoother.
- Damp rag protects joints – Wet and wring out a 2” wide strip of cloth and wrap it around the joint you want to safeguard. The wet rag will absorb the heat and prevents the solder in the existing fitting from melting;
- Use MAPP gas to speed up the process – Lead-free solder melts at a higher temperature than the now-banned lead-based solder. 5 to 10 seconds of heating with a MAPP gas torch is all that’s needed before you can feed solder into 1/2- to 3/4-in;
- Utilize a flame protector – Avoid soldering to close to wood or other flammable material without protecting it against the flame;
- Buy new fittings – Don’t reuse old joints. Recycle fittings instead. It’s time-consuming and difficult to disassemble and clean old joints. And there’s a high possibility they’ll leak. Use new fittings instead, and you’ll get better results in less time;
- Skip excess solder – Don’t feed too much solder into the fitting. It’s tempting to apply a few inches of solder into a joint as extra insurance from leaking. Still, excess solder can swamp inside tubes, restricting water flow, and can create small balls that break loose and damage faucet valves.
- Keep threads solder-free – Solder drips can clog the treads, making it challenging to attain a right seal when you screw on the matching part;
- Apply tinning flux – Tinning flux works just like standard one but contains a bit of silver solder powder that melts when the heat is applied. The resulting thin layer of solder ensures a leak-proof joint;
- Keep pipes dry – Avoid soldering pipes with water in them. Soldering a joint in tubes that contain any amount of water is nearly impossible. Most of the heat goes into turning the water to steam. Therefore, the copper won’t get hot enough to melt the solder;

- Assemble pipes all at once – Cut, flux, and assemble pipes and solder them all together. Soldering one joint at a time is non-effective. Employ straps to support the pipes if required. Clean and flux the end of every tube and the inside of the fittings before installing them. Then, before you begin soldering, press the tubes firmly into the fittings to ensure they’re fully seated. Start soldering at one end of the workpiece and move consistently from one joint to the next.
Most Frequently Asked Questions
We’ve selected some of the most frequently asked questions and answered them for you.
Do I need flux to solder copper pipe?
Flux protects the copper against oxidizing as you heat the metal using the torch. You can solder without paste, but it’s quite tricky. Flux is applied to both the fitting and the pipe with a handy miniature paintbrush. You don’t need massive amounts to be efficient.
Can you solder over old solder?
You have to heat the joint up with the torch, once the solder begins to melt use Channellocks to pull the fittings apart. When the joint is apart, wipe as much old solder off as you can employing a rag. Now you can start over – clean, flux, and solder.
What does flux do when soldering copper?
The flux will draw in the solder after the pipe is heated with a blow torch. The acid in the paste attracts the solder into the seam between the two copper parts and fills the gap and forms a semi-permanent bond between the fittings.
What type of solder should I use for copper pipe?
Copper pipes employed to carry the household water supply should be connected with non-lead solder joints, to escape poisoning users, especially children. Tin antimony is usually utilized – an alloy that is near the lowest alloy melting point (Eutectic alloy) is preferred since it goes rapidly from liquid to solid without lingering in pasty form, which enables joints to slip before they cool, weakening them.
Verdict
Copper pipe soldering can be a handy skill to know, but it’s not the easiest DIY process, but with some practice, you can solder copper water pipe successfully. It’s highly recommended that you practice on old pipes, a worthwhile investment until you build enough confidence to tackle plumbing in your house.
