How to Make a Knife Step By Step – Homemade Knives
A knife is a fundamental tool, one of the first ever crafted. It’s an essential tool for almost everybody. You can use a knife in the kitchen when preparing food or for camping and hunting. In worst cases, it becomes self-defense tools. So, making your own knife isn’t “mission impossible.”
With a few tools, the skills to use them, and time you can made own knife. Knives can be created using a steel piece for the blade and wood or other materials for the handle. DIY knife blades are made by one of two techniques: stock removal or forging.
Stock removal is the process of taking sheets or blocks of material and removing material until it gets final shape.
Forging is metal shaping process performed with hammering tools or forging presses powered by electricity, compressed air and hydraulics. Stock removal is a better option for beginners, since it requires less experience or tools.
Read this brief guide gingerly on how to make knives and what equipment to use for knifemaking.
Step #1 Sketch the Knife
Get started with the process of making your homemade knife. Use paper to design the shape of a blade. Try to keep it at 1:1 scale size for easy construction. The length of the blade is your personal choice. Still, large knives can be bulky and need a lot of steel.

Step #2 Choose Tools and Knife Making Steel
Avoid stainless steel, because it must be sub-zero tempered and doesn’t make nice blade. 1/8” thick carbon steel (01) is excellent knife making steel for creating a blade because it is easy for drenching.

Trace blade onto the slab with a permanent marker. It will be the guide for cutting the steel. Make sure to trace the tang accurately, since the tang and blade are connected in one piece.
Wood material is an ideal material for making a handle. Nevertheless, you can create a handle of anything you want. For the full tang knife, the adequate materials that you can attach with rivets are kirinite, G10 and micarta. These materials are best for knife making since they’re waterproof.
Trace blade onto the slab with a permanent marker. It will be the guide for cutting the steel. Make sure to trace the tang accurately, since the tang and blade are connected in one piece.
You may use a hacksaw, an angle grinder with cut-off wheel, bandsaw, grinder, vise, drill, and safety wear.
Step #3 Steel Cutting
Use a hacksaw to cut a rectangle about traced blade to separate it from the main slab. Take a stiffer hacksaw for thicker steel. Then, you’ll grind down the rectangle to form the blade profile.
Place the rough-cut blade into a vise and grind away excess steel. Keep track the guidelines to mold the profile. Use the grinder to finish the blade shape. Then, softly grind the edge into a slope with the grinding wheels . Form this slope on each side of the blade, and you’ll get the wanted blade edge.
Then, use the same size drill bit as the rivets that you are going to use. Place the holes in the tang. Relying on the blade size, you may require a different number of holes.
Now, sand the blade with sandpaper or finer grits. Ensure to sand out any scratches. Sand all surfaces of the blade. This will boost its quality and shine.
Step #4 Heat Treating the Blade
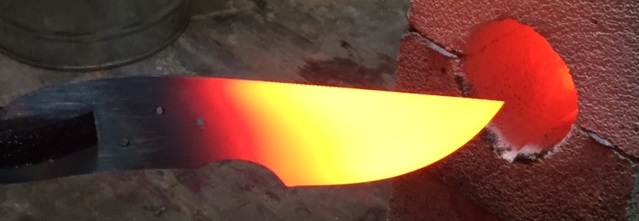
The ideal way to heat a blade is with forge (a type of brick or stone-lined fireplace used for heating metals). For smaller blades, you can use a torch (thick stick with material that burns, used as a light source). Use gas or coal forge for this process.
Make ready quench hardening (mechanical process for strengthening and hardening of steel). For cooling the knife, you must douse it in a hardening bath (a bucket of motor oil). Then you sink the blade entirely in the bucket.

Keep it heating until the steel gets an orange color. Flick it versus magnet to look if it hot enough. When the steel achieves the proper temp, it loses its magnetic properties. Once, it doesn’t stick, allow it cool by air.
Repeat this action 3 times. On the 4th time, don’t air cool steel, just douse it in the oil bath. Be careful because there will be fire when the blade is placed into oil, so you must be adequately protected. Once the blade is hardened, it can break when dropped, so handle cautiously.
Now, you set oven (thermally insulated chamber used for the heating) at 420° Celsius. Place the blade on the middle rack and cook it for one hour. When the hour is up, a heat process is finished.
Again, sand the blade with finer grits of paper and polish the blade for some extra luster.
Step #5 How to Make a Knife Handle
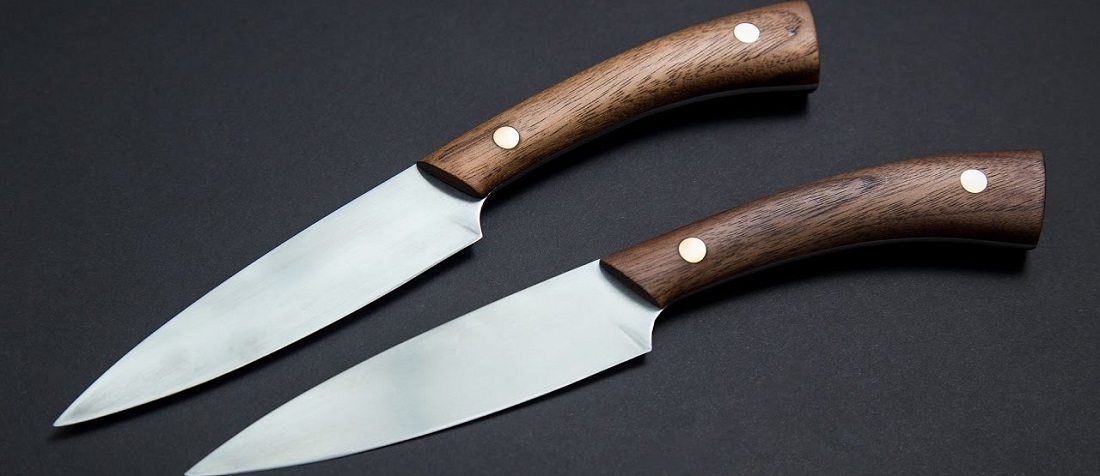
For a full tang knife, there are 2 parts of a handle, 1 on each side. Cut the wooden piece with a hacksaw and sand the pieces synchronal to be sure that both sides are symmetrical.

Then, drill the holes on each side for rivets. Put it in a vise and allow it dry overnight. Use a saw for final cuts and handle adjustments. Put the rivets, leave about 0.125 inches and peen them with a ball- peen hammer and file them down. Don’t forget to sand the handle.
Step # 6 Sharpening the Blade
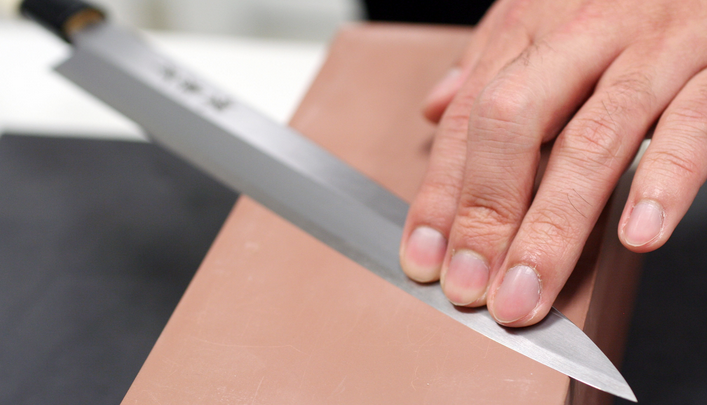
You need a big sharpening stone for this action. Cover the rough stone side lightly using sharpening oil. Then, keep the blade at a 20° from the area of the sharpening stone. Move the blade via the stone in cutting motion.

Pull up the handle while moving the blade to sharpen all the way to the top. After, a few moves switch the blade over to the other side. When you make a sharp edge on every part of the blade, rerun the sharpening on sharpening fine stone side. On this link you can find a lot more information on how to sharpen various cutting tools
Step #7 Test the Knife
Cut down the piece of paper. An adequately sharpened blade should easily slice the paper into ribbons. Enjoy, because you get your DIY knife.
Knife Making Equipment
If you want a homemade knife, you need the proper equipment. Because, knifemaking requires equipment, design, and adequate materials. The appropriate tools will contribute to make a quality blade and handle.
The blade is craft from steel by a heating process, grinding and cooling. It can be design at home or small warehouse with heavy or homemade equipment. The tools used for detailed knife blades are a disc grinder, surface grinder, and power drill.
Safety Wear
Safety equipment is necessary. The use of hand gloves is crucial to avoid burning and cutting during the sharpening or heating process. Eye goggles are highly recommended for those who’re using grinders. Powdered steel and debris may infect the eye or even inhaled. Work apron is excellent to avoid irritation inflicted by steel dust and dirtiness.
Alternative Equipment
Knives can be crafted without the help of power tool equipment. As an alternative for non-electric knife making can be performed with tools more available at hardware. Tools for making a knife at home are a hammer, epoxy, tongs, scribe, workbench, coarse bench stone and various grades of dry and wet sandpapers.
Shaping Tools
- Making of knife starts with the laying out of the design,
- The size and shape of the blade can be made into a wooden or plastic template,
- Use the scribe to draw a design on an annealed piece of metal. The band saw easily cuts the metal into its proper shape,
- The disc grinder smooths the edge of the annealed metal while the surface grinder flattens it.
- Making a knife without electric tools requires the hammer, anvil, tongs for flattening the metal blade,
- A file is used to shape the steel edge if there is no band saw available. Surface grinders are great for removing any scratches or burr on the metal blade.
Heating Treatment Equipment
With an adequately heated process, the blade’s shape and flatness are easier for manipulation. Stone ovens or gas forgers are great for reaching the high temp of 800°. It’ll remove any magnetic material in metal and become durable and hard as it’s treated. The heat must progressively decrease as the blade is treated to avoid brittle result.
The metal blade will be hardened by immersing it in cold water after the shaping and heating process. The blade must not dip right away after being heated, it must cool in the air until it’s no longer glowing, or the blade will become breakable and brittle. The heating treatment is finished when the wanted shape is achieved. Otherwise, you continue to hammer or place it under the surface grinder.
Finishing Tools
The adequate use of wet stones or a combination of wet and sandstones can provide to knife’s edge and shiny surface finish. Knife handles are attached with epoxy or by drilling holes into the blade and using small rivets or screws. An oilstone is best for making an elegant finish, it doesn’t create burrs, and it’s easy for manipulation.
Tips for Beginners
01-tool steel with a dimension 1-1/2-by-7-1/2-inch piece is ideal for beginners in knife making. It is simplest to heat treat but needs permanent care since it can rust quickly when left wet.
The knife’ is made of two slabs of hardwood or different wood type. Birch and walnut wood are recommended for making handles as they are easier to cut out.
