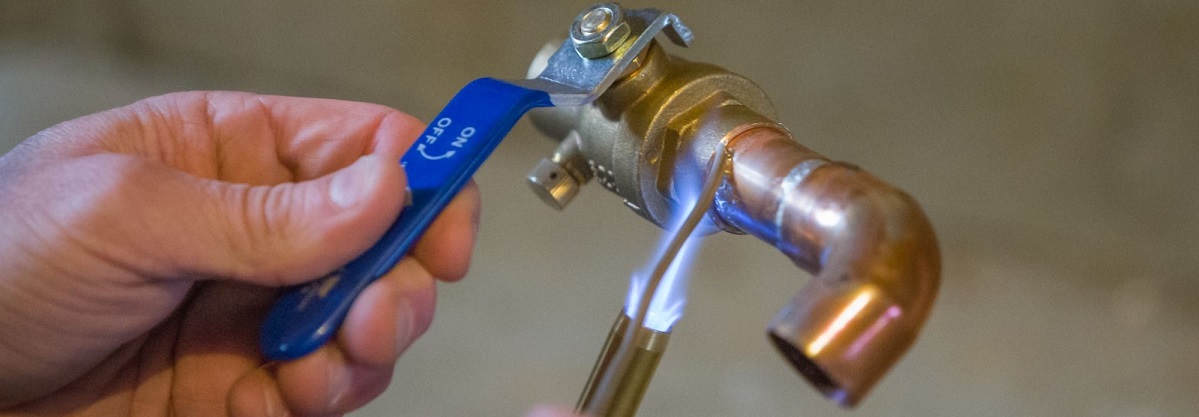
How to Solder Copper Pipe Like a Pro: A Complete Step-by-Step Guide
Do you know how to solder copper pipe?
It’s a pity if you don’t. The art of copper pipe soldering can be incredibly helpful when doing different DIY plumbing projects at home or want to give your neighbor a hand when dealing with plumbing inconveniences.
Soldering copper pipe is not a difficult task, and you don’t need plumbing knowledge in order to get the job done. All you need is a dose of patience and some soldering skills you can learn directly from this guide.
Let us walk you through this step-by-step guide to soldering copper pipe and acquire a new skill today.
Before We Start: Essential Tools You Need for Soldering Copper Pipe
You need some tools in order to do the job with a high-efficiency level.
- Soldering iron or soldering torch is a must-have. Opt for one that uses propane as a power source.
- Deburring tool removes the uneven pieces of metal from your pipe and fitting.
- A wire brush is essential for cleaning the inside of the pipe fittings.
- A pipe cutter allows you to cut your pipe to size.
- Plumber’s tape has an abrasive surface similar to cloth sandpaper. You need it for smoothing rough edges on the pipes.
- Pipe fittings made of copper are essential for the process. Ensure they’re fitting before you start soldering.
- Copper pipes are a must if you are repairing them.
- Soldering wire is what melts and flows into the joints between two parts of the copper pipe.
- Flux is a type of soldering paste, and it protects the fitting from flame.
- Rag allows you to clean the extra flux from the pipes.
- The bucket is vital when you need to drain your pipes.
- Ventilation is crucial because of odors and smoke resulting from soldering.
- Safety glasses will shield your eyes from sparks and solder that may fly off.
- Soldering gloves protect your hands from the flame.
- A heat shield is a fireproof fabric used to protect walls, floors, and other flammable items.
- A fire extinguisher will come in handy in case of an accident.
- A soldering iron stand is a place to put your hot soldering torch. If you don’t have one, make sure you put the torch on a surface that’s not flammable.
How to Solder Copper Pipe with Water in It?
It’s recommended to keep copper pipes dry when soldering. The water in pipes works as a coolant, which may stop the essential heating process. You can use a pipe plug to stop the water from running. If the water still goes through the pipe, keep the bucket under the flow and turn off the supply from the valve.
Extra tip: Use bread to make a pipe plug. Make sure you make it thick enough so that it takes time for the water to seep through. Then use something to push it far enough, preventing it from burning while soldering.
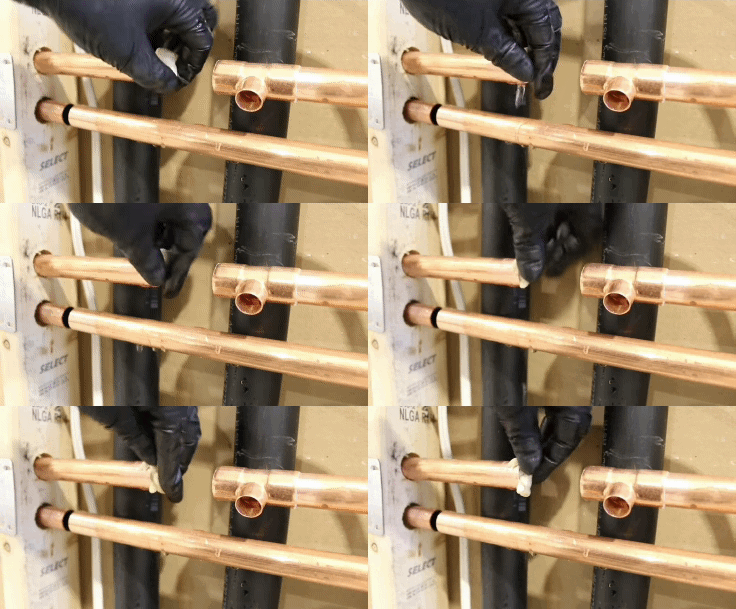
Video source: Got2Learn YouTube Channel
Bear in mind that it is difficult to solder the pipes with water. Therefore, you need to prepare them well before you get started.
Step 1: Clean the Copper Pipes’ Portions
To make sure the joints are leak-free, you’ll need to clean the portions of copper pipes that need to be soldered. You can use the sandpaper to clean the outer diameter of your pipe, the internal surfaces should be reamed with wire brushes. That way, you make sure both surfaces allow the solder to adhere to the pipe.

Step 2: Use Wet Rags to Protect Joints
Wet rags for soldering can work as both flame protectors and heat absorbers. Wet the rag and wrap it around the pipe’s fitting to safeguard the portions. At the same time, damp rags will absorb soldering heat, cooling the temperature and ensuring the solder doesn’t melt.
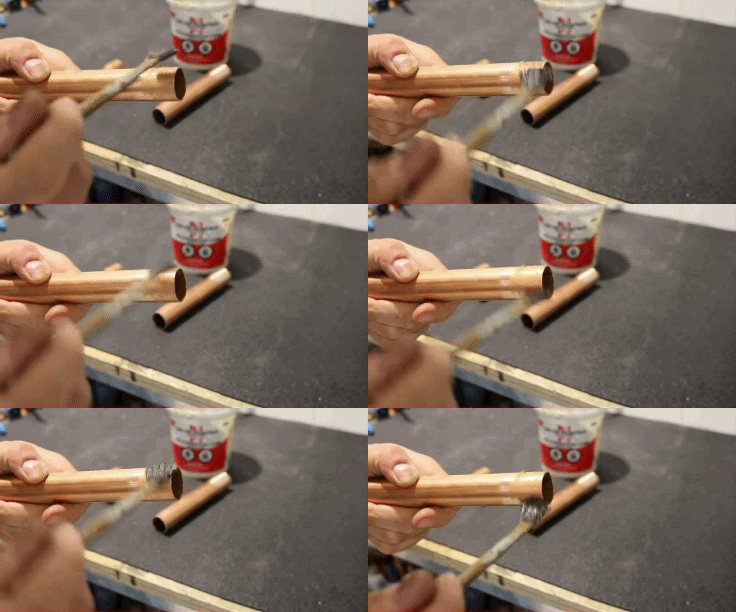
Step 3: Flux the Copper Pipe with a Brush
After completing the first two steps, apply a thin layer of soldering paste (flux) on the pipe’s surface to ensure the filler material optimizes capillary action when using the heat.
Step 4: Set the Soldering Iron at the Right Temperature
Setting your soldering iron at the right temperature is the key to success. The bigger the copper pipes, the higher the wattage you need to ensure optimal heat that gives results. It’s recommended to stick with soldering temperatures of between 750 to 800 degrees.
Step 5: Sweat Copper Pipe
Utilize lead-free solders if the copper pipe supplies potable water (if you see a ‘50/50’ code on solder wire product, it means it is not lead-free). Ignite your propane torch and apply the heat for about 5 seconds to get the soldering paste to sizzle evenly. Repeat the process on the opposite area of the copper fitting to ensure even heat distribution.
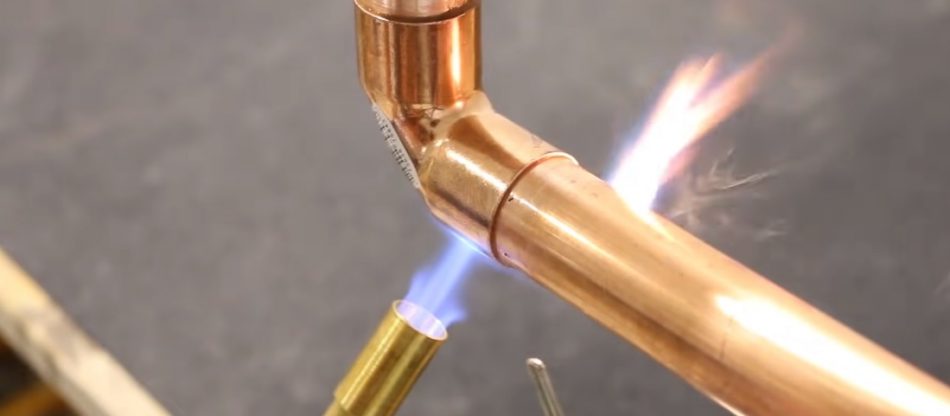
Step 6: Final Inspection and Leak Tests
Inspect the joint to see whether it has been soldered well. You might need to fill potential voids on the joint with some flux and re-solder them.

Images source: Got2Learn YouTube Channel
How to Re-Solder Copper Pipe Joint without Removing It?
If sweating copper pipe doesn’t provide expected results, you’ll need to do it again. All you have to do is reapply the flux, heat the joint, and solder the disturbed area. Wait a couple of minutes until the joint cools down, and apply the flux to clean it up. Once the process is done, and the solder has solidified, use a rag to wipe off the excess flux.
MORE EXCITING STUFF FOR MAKERS:
- Best Soldering Iron in 2022: Top 13 Choices for Beginners, Hobbyists, and Professionals
- A Complete Guide to Soldering
- A Super-Simple Guide to the All Types of Welding
- Simple Welding Joints Guide
- 100 % Covered Welding Tools List
- Introducing Blazing 101: What Is and How Does It Work?
- 8 Most Efficient Solutions for Removing Rust from Metal
- 10 Tips on How to Cut Stainless Steel
How to Solder Copper Pipe without Flame?
Soldering copper pipe without flame, solderless copper bonding, or cold welding is the process you can perform safely, using a liquid polymer, which is applied to pipe fittings to weld them together hermetically, without allowing any particle to get in.
Cold copper bonding is suitable for situations when the pipes are in a difficult soldering position or have already had a slight drip. Additionally, this method is beneficial for all those who are afraid of flame and soldering itself. Keep in mind that this soldering technique is not suitable for flexible pipes but rigid ones only.
Keep reading to learn how to fix copper pipe without solder.
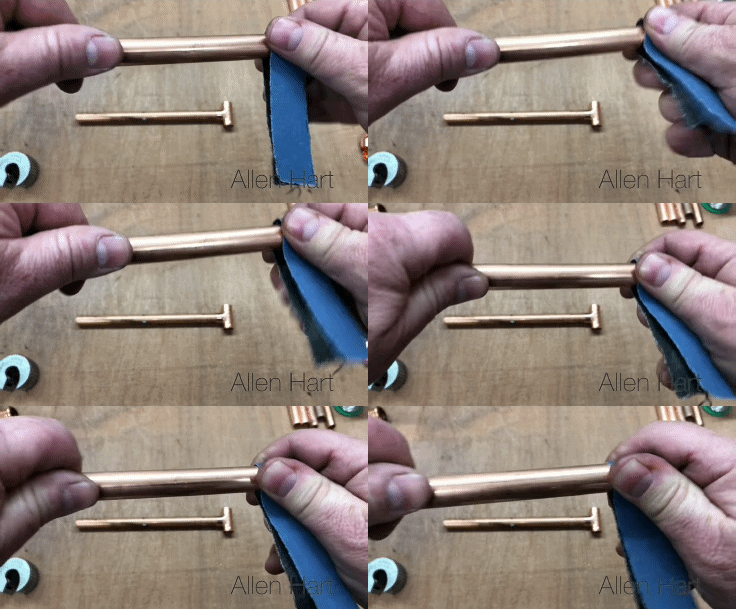
Step 1: Sand the Pipe and Connector
Use the sixty grip sandpaper for sanding the pipe and the connector.
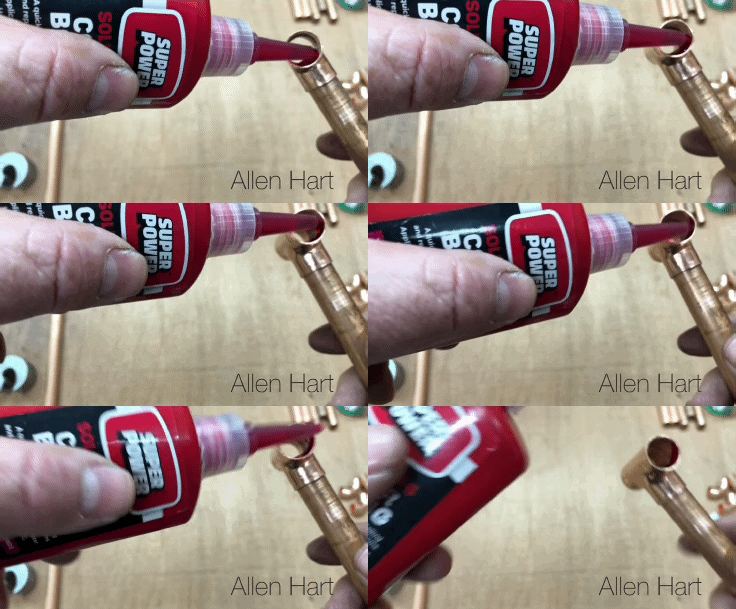
Step 2: Apply the Agent to the Pipe
Shake the bottle first, and then apply the solderless copper bonding agent to the pipe and connector, following the zig-zag pattern.
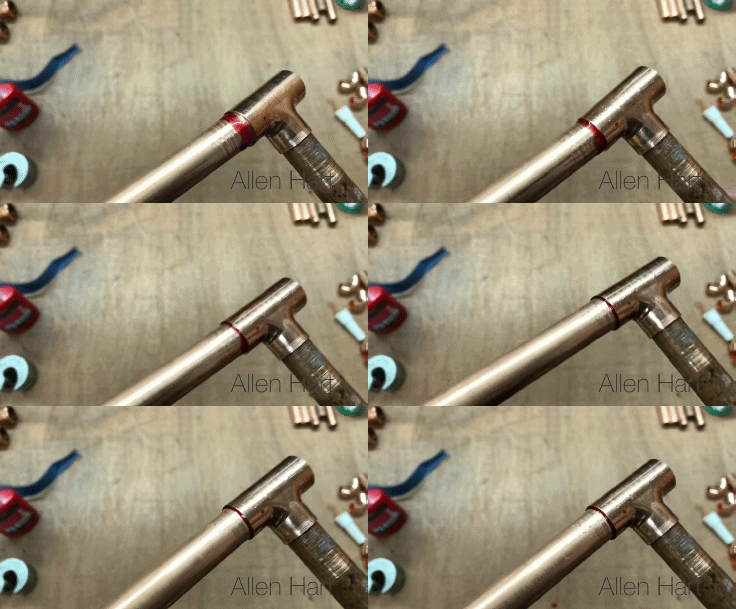
Step 3: Insert the Pipe into the Connector
Insert the pipe into the connector and rotate 360 degrees. Wait for about 10 seconds until the bond has set.
Image/Video source: Allen Hart YouTube Channel
How to Solder Copper Pipe Upside Down?
Although the explanation for soldering vertical pipe may seem unnecessary, the truth is that it differs a lot from soldering a horizontal one. In fact, they require entirely different approaches in order to get expected results.
While soldering horizontal joints comes with no restrictions, the bottom joint on a vertical pipe should wick the solder upwards and beat the gravity. Before you start with the process, ensure there is no water dripping from the tube.
Amazon
Step 1: Use Sandpaper or Abrasive Pads to Clean the Pipe Ends
The pipe ends must be completely clean before you start the soldering process. You can use either sandpaper or abrasive pads to do it. Don’t forget to deburr the pipe.
Don’t rush – adequate preparation is 90% of the job done, and it should be performed efficiently and meticulously, especially for vertical joints. If joints are not clean enough, it may prevent the solder from wicking upwards and fighting gravity.
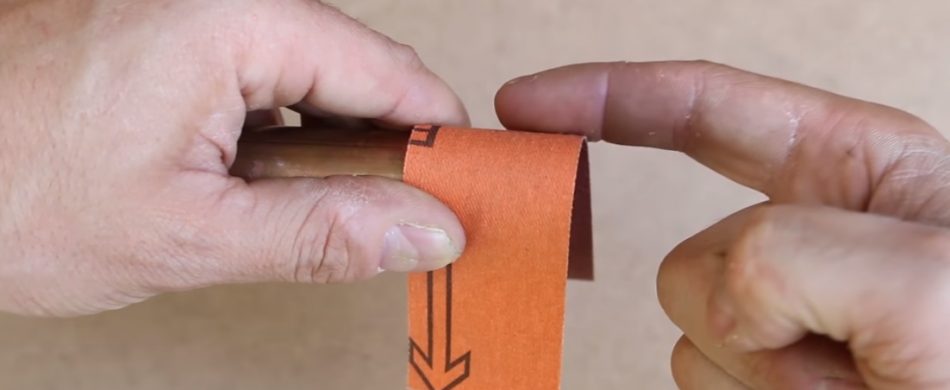
Image source: Got2Learn YouTube Channel
Step 2: Apply the Flux
Use a brush to apply the flux on the pipe ends. Fluxing is a crucial part of soldering a vertical pipe – if you don’t use it, all your work will be in vain.
Step 3: Ensure the Vertical Pipe is Well Supported
If your vertical pipe’s fitting is not well supported, it may let go of the pipe as you’re heating it. One of the ways to secure it is by pinching the coupling with adjustable pliers and rotate the pipe, providing enough tension to hold it while you’re soldering.
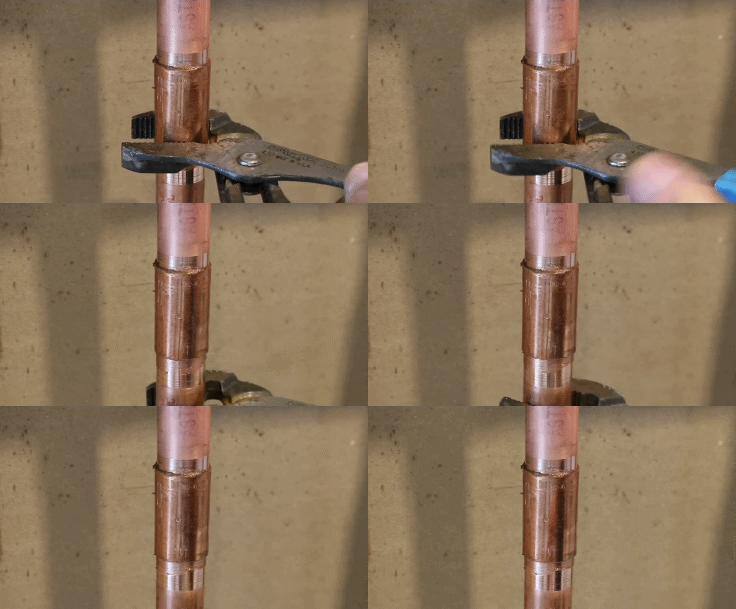
Video source: Got2Learn YouTube Channel
ctetur adipiscing elit. Ut elit tellus, luctus nec ullamcorper mattis, pulvinar dapibus leo.
Step 3: Solder the Pipe
When soldering a vertical copper pipe, make sure you’re heating close to the middle part, preventing overfeeding a joint. Always heat the opposite side of where you’re applying the solder to prevent its break-off.
Step 4: Wipe Any Excess Flux Left from Soldering
If you don’t remove flux left from soldering, you are at risk of long-term copper damage. Don’t forget to wipe it clean when you finish soldering.
